
So, you’ve been thinking about going Solar Panels Cheap but the high cost of commercial solar panels is giving you second thoughts? Why not build your own? Not only is it a rewarding DIY project, but it can also save you a significant amount of money. Let’s dive into how you can create your own solar panels cheap and efficiently. Solar Gadget
In This Post
Understanding Solar Panel Basics
What Are Solar Panels?
Solar Panels Cheap are devices that convert sunlight into electricity. They are made up of many solar cells, usually composed of silicon, which generate electrical power by the photovoltaic effect.
How Do Solar Panels Work?
When sunlight hits a Solar Panels Cheap cell, it knocks electrons loose from their atoms. This movement of electrons creates an electric current, which is captured and directed to power electrical devices or charge batteries. Solar Gadget Reviews
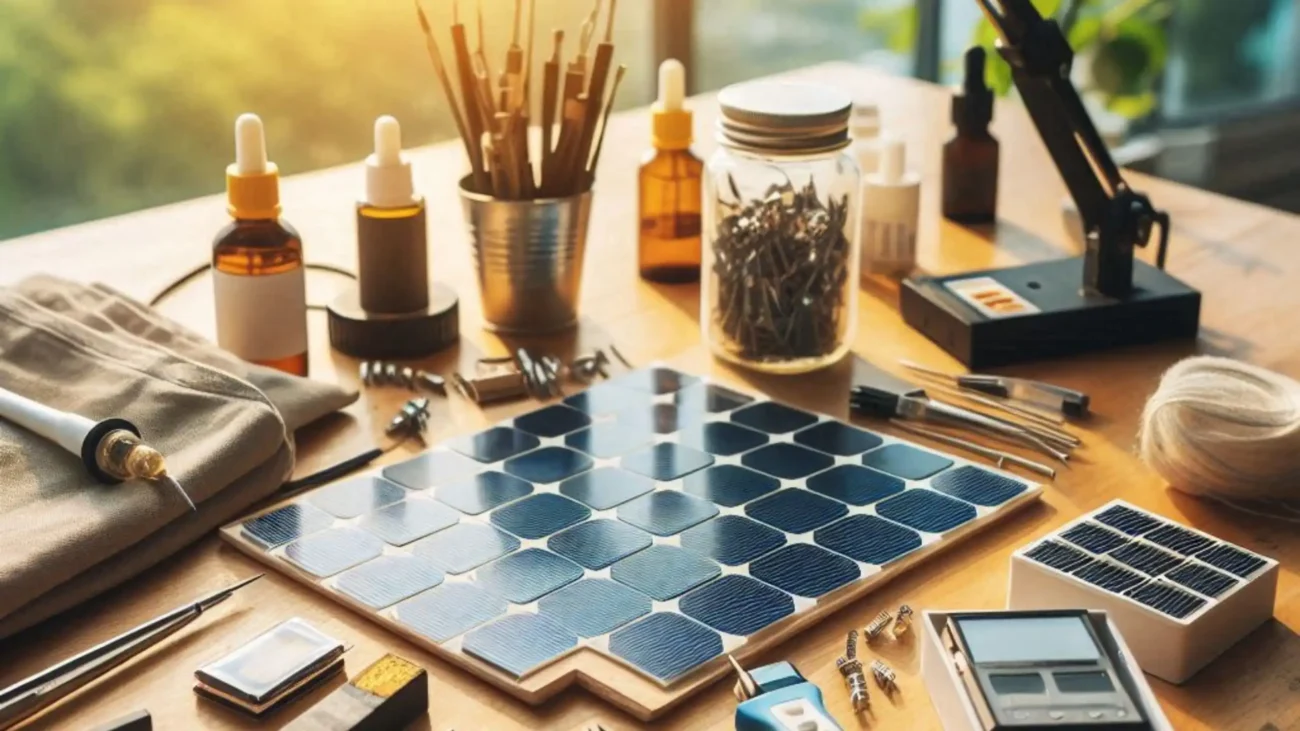
Materials Needed for DIY Solar Panels
List of Materials
- Solar cells
- Plywood board
- Glass sheet or Plexiglass
- Tabbing wire
- Bus wire
- Flux pen
- Soldering iron
- Silicon sealant
- Junction box
- Diodes
- MC4 connectors

Where to Source Affordable Materials
You can find most of these materials online or at local hardware stores. Look for bulk deals and discounts to keep costs low. Online marketplaces like eBay or specialized Solar Panels Cheap equipment stores often have sales on solar cells and other components.
Preparing the Solar Cells
Types of Solar Cells
There are primarily two types of solar cells you can use: monocrystalline and polycrystalline. Monocrystalline cells are more efficient but slightly more expensive, while polycrystalline cells are more affordable and still quite effective.
Purchasing Solar Cells on a Budget
Look for solar cells that have minor cosmetic defects. These cells are usually sold at a lower price but still function perfectly. Be sure to buy a few extra cells to account for any that may be damaged during assembly. Solar Blog
Inspecting and Testing Solar Cells
Before assembly, inspect each cell for cracks or other damages. Test their voltage output using a multimeter to ensure they are functioning correctly.
Assembling the Solar Panel
Step-by-Step Assembly Guide
- Lay Out the Cells: Arrange the cells on a flat surface in the desired configuration.
- Soldering: Use the tabbing wire and soldering iron to connect the cells.
- Connect Rows: Join the rows of cells with bus wire.
Soldering Solar Cells Together
Solar Panels Cheap Soldering is a delicate process. Use a flux pen to clean the contact points on the cells, then carefully solder the tabbing wire to connect the cells in series.
Connecting the Solar Cells
Ensure all cells are properly connected, creating a continuous circuit. Each connection should be firm and stable to avoid power loss.

Creating the Solar Panels Cheap Frame
Choosing the Right Frame Material
You can use wood, aluminum, or PVC for the frame. Aluminum is lightweight and durable but can be more expensive than wood or PVC.
Building the Frame
Cut the material to size and assemble it into a rectangular frame that fits the layout of your solar cells. Ensure it is sturdy and stable.
Installing the Solar Cells in the Frame
Place the connected solar cells into the frame, ensuring they are secure and evenly spaced. Use silicon sealant to fix them in place.
Wiring the Solar Panels Cheap
Understanding Electrical Wiring
Proper wiring is crucial for the panel’s performance. Use quality wires and connectors to ensure efficient energy transfer.
Connecting the Solar Cells to the Junction Box
Attach wires from the solar cells to the junction box, which will serve as the output point for the Solar Panels Cheap. Use diodes to prevent reverse current flow.
Adding Bypass Diodes
Bypass diodes protect the solar panel from shading effects and ensure that shaded cells do not reduce the overall performance of the panel.
Sealing and Protecting the Solar Panel
Using Glass or Plexiglass
Cover the solar cells with a glass sheet or Plexiglass to protect them from the elements. Glass is more durable but heavier, while Plexiglass is lighter but may scratch more easily. Solar Guides
Sealing the Edges
Use silicon sealant to seal the edges of the glass or Plexiglass, ensuring no water or debris can enter the panel.
Weatherproofing Tips
Consider adding a weatherproof backing to the panel for added protection. Ensure all seams and edges are well-sealed.
Installing the Solar Panel
Choosing the Right Location
Install your Solar Panels Cheap in a location that receives maximum sunlight throughout the day. Avoid areas with frequent shading.
Mounting Options
You can mount the panel on your roof, a pole, or a ground-mounted frame. Ensure it is securely attached and stable.
Angling for Maximum Sun Exposure
Tilt the panel at an angle that maximizes sun exposure. This angle varies based on your geographical location and the time of year.
Connecting to Your Electrical System
Using a Charge Controller
A charge controller regulates the voltage and current coming from the solar panel to the batteries, preventing overcharging and extending battery life.
Connecting to Batteries
Connect the solar panel to a battery bank to store the energy generated. Use appropriate cables and connectors to ensure efficient power transfer.
Using an Inverter
An inverter converts the DC power from the solar panel into AC power, which is used by most household appliances. Choose an inverter that matches your power needs.

Testing Your Solar Panel
Measuring Voltage and Current
Use a multimeter to measure the voltage and current output of your solar panel. Compare the readings to the expected values to ensure it is functioning correctly.
Checking for Faults
Inspect all connections and components for any signs of faults or damage. Ensure there are no loose wires or poor solder joints. Gadget For Travelers
Ensuring Optimal Performance
Regularly monitor the performance of your solar panel and make adjustments as needed to ensure it is operating at peak efficiency.
Maintenance and Troubleshooting
Regular Maintenance Tips
Keep the surface of the panel clean from dust and debris. Inspect the panel regularly for any signs of damage or wear.
Common Issues and Fixes
- Low Output: Check for shading or dirt on the panel.
- Loose Connections: Inspect and tighten all connections.
- Damaged Cells: Replace any damaged cells.
When to Seek Professional Help
If you encounter issues that you cannot resolve, seek help from a professional solar technician to avoid damaging your system or compromising safety.
Cost Analysis
Initial Investment
The cost of materials for a DIY solar panel can range from $100 to $300, depending on the quality and quantity of the components.
Long-Term Savings
DIY solar panels can significantly reduce your electricity bills, providing a return on investment within a few years.
Comparing DIY vs. Commercial Solar Panels
While commercial panels are more efficient and come with warranties, DIY panels offer a hands-on, cost-effective alternative for those willing to invest time and effort.

Safety Considerations
Handling Electrical Components Safely
Always use insulated tools and wear protective gear when working with electrical components.
Working with Tools and Materials
Follow safety guidelines when using tools and handling materials. Ensure your workspace is well-ventilated and free from hazards.
Safety Gear and Precautions
Wear safety glasses, gloves, and appropriate clothing. Keep a first aid kit and fire extinguisher nearby.
Conclusion
Building your own solar panels can be a rewarding and cost-effective way to harness renewable energy. By following these steps and taking proper safety precautions, you can create efficient and affordable solar panels that reduce your carbon footprint and save on energy costs.
FAQs
How much does it cost to build a DIY solar panel?
Building a DIY solar panel typically costs between $100 and $300. This includes expenses for solar cells, a frame, wiring, and protective materials like glass or Plexiglass. Costs can vary based on the quality and quantity of materials chosen.
How long does a DIY solar panel last?
A DIY solar panel can last between 10 to 25 years, depending on the quality of materials used and how well it is maintained. Regular cleaning, proper installation, and timely repairs can extend its lifespan.
Can I power my entire home with DIY solar panels?
Powering an entire home with DIY solar panels is possible but challenging. It depends on your home’s energy consumption, the number of panels you build, and available sunlight. Multiple DIY panels can potentially meet your energy needs, but professional systems are often more reliable and efficient.
What if my DIY solar panel doesn’t work?
If your DIY solar panel doesn’t work, check for loose connections, damaged cells, and proper wiring. Ensure all components are correctly installed. If problems persist, refer to troubleshooting guides or consult online forums for advice. Professional assistance may be necessary if issues cannot be resolved.
Are there any legal issues with installing DIY solar panels?
Installing DIY solar panels can involve legal issues. Check local regulations and building codes, as some areas require permits, inspections, or adherence to specific guidelines for solar installations. Always verify legal requirements with local authorities before proceeding with your project.